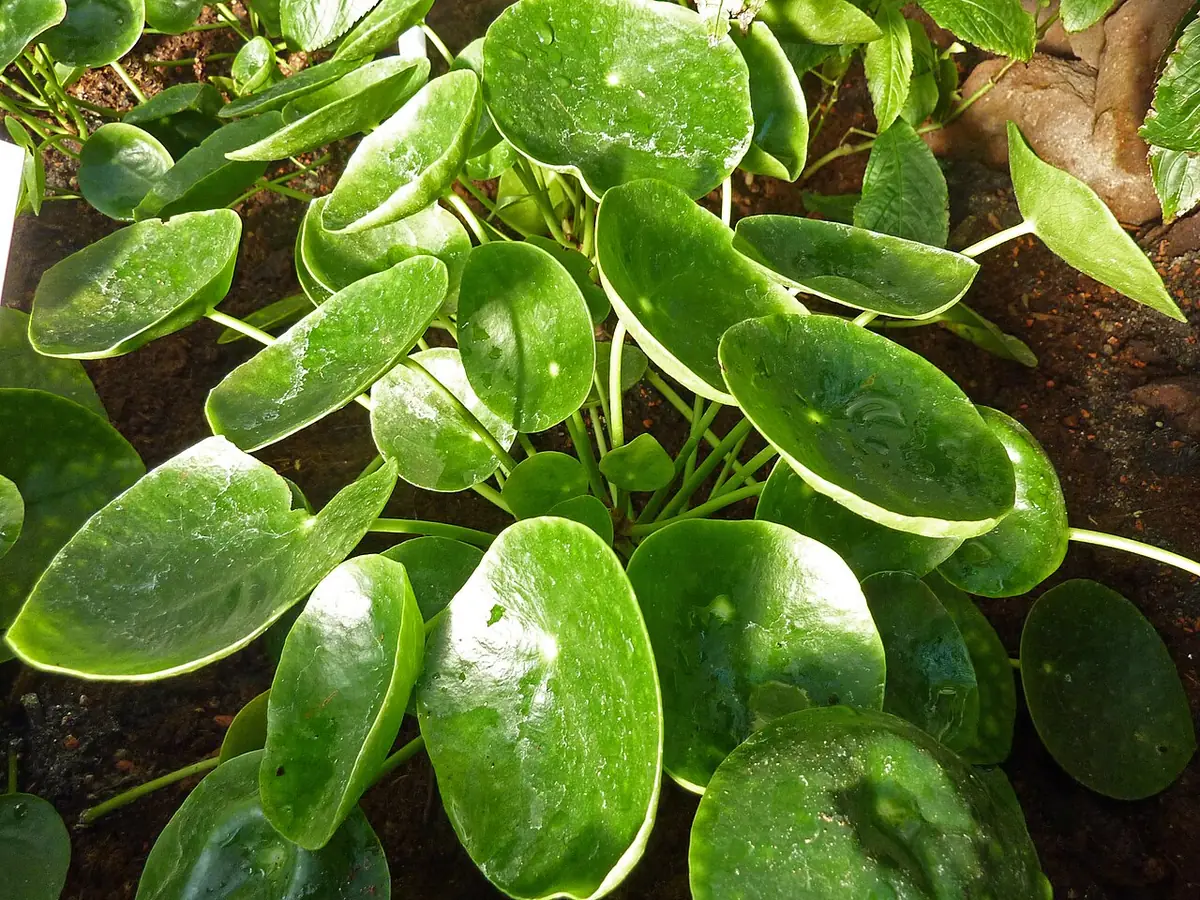
A Pilea produces offsets from both the stem and the surrounding root area. Choose one with a usable root section and remove it with a clean tool during an appropriate growing period. A very small rootless offset needs propagation care and should not be expected to behave like a mature plant in a larger pot.
Light and root conditions
For light, choose bright indirect light. Stand at leaf level and look toward the window, since a bright room can still have a surprisingly dim corner. Curtains, outdoor trees and the changing angle of the sun alter the light that reaches Pilea peperomioides. Move a plant toward stronger light in small stages over several days. Sudden exposure can damage foliage before the roots have adjusted to the additional water demand.
Water when the top layer dries. Test below the surface instead of relying only on how the top looks. A light finger check near the edge, supported by the weight of the pot, is generally more informative than a weekly calendar reminder. For Pilea peperomioides, water slowly over the mix until the root ball is evenly wetted, then allow surplus water to escape. Never leave the inner pot standing in water hidden inside a decorative cover.
Make a practical adjustment
Choose a draining pot with enough weight to prevent tipping. Fill it with a free draining indoor potting mix. Drainage holes are necessary, and covering them with a shard or screen must not block their flow. A layer of gravel does not turn a sealed container into a draining one. With Pilea peperomioides, an oversized pot can hold unused wet mix around a small root system, making an otherwise reasonable watering habit difficult to judge.
The most useful practical adjustment is to rotate the pot regularly and keep the stem from leaning far toward one window. Do that before making several other changes at once. Give Pilea peperomioides a period of stable care afterward so you can see the response in new growth. Keep a brief note of the change and the moisture condition on that day. A photograph from the same angle can reveal small improvements that are difficult to remember from one week to the next.
When assessing a problem, remember that curled leaves can reflect light, moisture or temperature changes, so change one condition at a time. Inspect the underside of a leaf and the point where each stem meets the mix. For Pilea peperomioides, compare the condition of older foliage with the youngest leaf rather than judging the whole plant by one blemish. Damaged tissue rarely becomes perfect again, so healthier new growth is often a more useful sign that an adjustment is working.
Watch growth and maintain care
For routine upkeep, remove an offset only after it has formed roots of its own. Use clean scissors when a cut is needed and avoid removing a large amount of healthy foliage during an adjustment period. Feed Pilea peperomioides only when it is growing and follow the houseplant fertilizer label for concentration and frequency. Dry roots or a stressed plant do not benefit from an extra strong feed. If pale deposits collect on the mix, assess accumulated salts before adding more nutrients.
One detail worth keeping in mind is that older lower leaves may fall as the central stem lengthens, while vigorous new growth remains a useful sign. Place Pilea peperomioides where leaves are not repeatedly brushed by a door, a curtain or moving furniture. Avoid direct hot or cold airflow. Plants that are safe to handle for routine care are still best kept beyond the reach of small children and pets unless their suitability has been independently confirmed. Wash hands after handling potting mix and put tools away after use.